

Table of Contents
- What You'll Need Before You Start Layering
- Necklace Layering Lengths Guide: Finding Your Perfect Drop Points
- How to Prevent Necklaces from Tangling: Practical Solutions
- How to Mix Metals in Jewelry: Creating Visual Harmony
- Layering Based on Neckline and Body Proportion
- Stacking Rings and Bracelets: Extending the Layered Look
- Maintenance and Longevity for Layered Fine Jewelry
- Budget-Conscious Scaling: Building Your Layered Collection Over Time
- Frequently Asked Questions
Last Updated: September 17, 2026
What You'll Need Before You Start Layering
Learning how to layer fine jewelry pieces starts with a simple principle: build from a foundation, then add contrast. This guide from TresAdore walks through the chain lengths, metals, and habits that make a layered look hold together all day. Most people rush to buy the statement piece first. That is backwards.
Essential Base Pieces for Your Collection
Start with three chains in different lengths and one or two rings you can stack. A fine curb chain, a delicate rolo chain, and a slightly heavier paperclip chain cover almost every look. Add a pendant you love and a simple band, and you have a working collection.
Tools That Make Layering Easier
Small accessories solve most layering problems before they start:
- Necklace spacers or connector clasps to hold chains apart
- A jewelry tray with separate compartments
- Small zip pouches for travel
- A soft polishing cloth
Necklace Layering Lengths Guide: Finding Your Perfect Drop Points
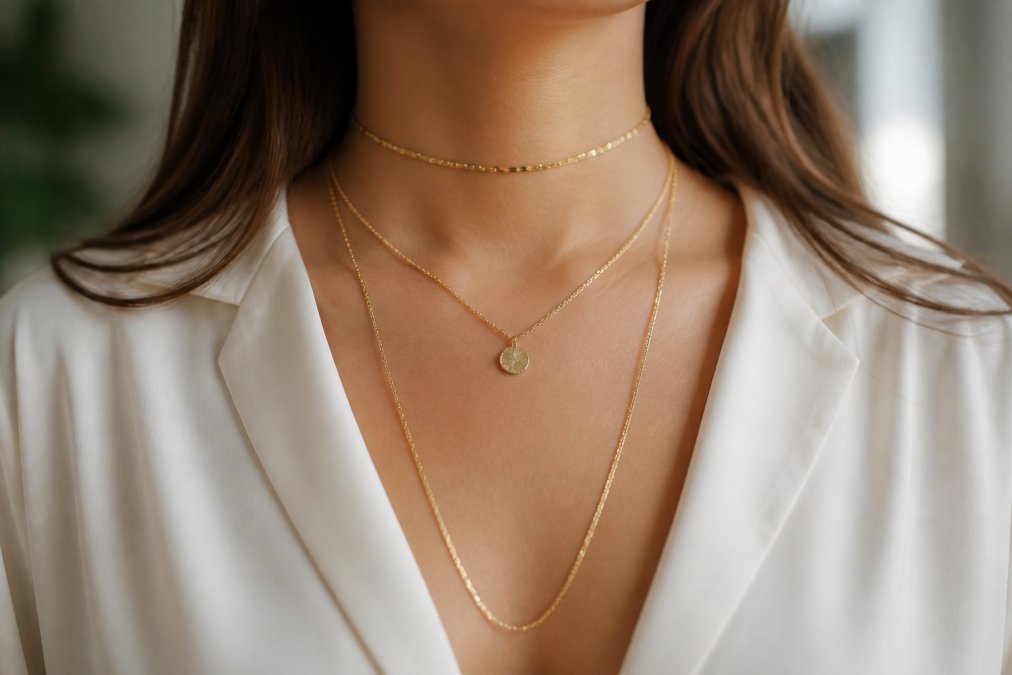
The necklace layering lengths guide comes down to three zones: 16 inches sits at the collarbone, 18 inches rests just below it, and 20 to 24 inches falls toward the sternum. Space chains at least two inches apart so each piece reads as separate rather than clumped.
Standard Chain Lengths and Where They Fall
| Length | Drop Point | Best Paired With |
|---|---|---|
| 16 inches | Collarbone | A single pendant |
| 18 inches | Below the collarbone | A mid-length charm |
| 20-24 inches | Upper sternum | A statement piece |
| 30+ inches | Below the bust | A long pendant or tassel |
The 2:1:1 Rule for Balanced Layering
The 2:1:1 rule means two delicate chains, one medium chain, and one statement piece. It keeps a stack from looking either flat or cluttered. If you are layering fine jewelry for the first time, this ratio is the fastest way to get a balanced result.

How to Prevent Necklaces from Tangling: Practical Solutions
Tangles happen when chains of similar weight sit at the same drop point and twist together. The fix is visual separation: vary the weight of each chain and use a spacer or connector clasp to physically hold them apart.
Spacers, Clasps, and Layering Techniques
A magnetic spacer clips two chains together at the back so they cannot cross. A multi-strand clasp turns three necklaces into one clasp point, which is the single biggest upgrade for anyone layering fine jewelry daily.
Travel and Storage Solutions for Layered Pieces
Pack each chain in its own small pouch or wrap it around a felt roll. For travel, wear your base layer and pack the statement piece separately. A hard-sided case with individual slots prevents the pressure that bends thin links.
How to Mix Metals in Jewelry: Creating Visual Harmony
Mixing metals in jewelry works when one tone dominates and the others accent it. Pick a primary metal, then add a second tone in a smaller piece. Warm gold next to cool silver reads as intentional when the pieces share a similar level of shine.
The 70/30 Metal Ratio
A common pattern among stylists is to keep roughly 70 percent of the visible metal in one tone and 30 percent in the accent tone. On a three-chain stack, that usually means two yellow gold chains and one white gold or silver chain. Flip the ratio and the accent becomes the story, which is fine if that is the intent, but it stops reading as a layered look and starts reading as a mismatched one.
- Yellow gold base: add one white gold or sterling silver chain near the center of the stack
- Silver or white gold base: add a single yellow gold pendant or charm as the focal point
- Rose gold: treat it as a warm tone and pair it with yellow gold, not silver, to avoid a muddy middle
Bridging Tones With Two-Tone and Gemstone Pieces
Two-tone pieces are the fastest shortcut to a deliberate mix. A chain that combines 925 sterling silver with gold-plated detailing carries both tones in a single strand, so it visually connects a yellow gold stack to a silver one. [TresAdore's Starry Sky Pearl Necklace is built this way](/products/null-1772910274088), the silver chain does the bridging work so you do not need a separate accent chain.

Mixing Vintage and Modern Pieces
Vintage pieces usually carry more texture and patina. Pair one antique-inspired piece with clean modern chains so the contrast reads as deliberate. The rule of thumb: let the vintage piece be the only textured element in the stack, and keep every other chain smooth. Two textured pieces at different drop points compete for attention and flatten the whole look.
Layering Based on Neckline and Body Proportion
Match your layers to your neckline and your proportions follow naturally. A V-neck calls for a pendant that echoes the angle of the fabric. A crew neck needs a shorter base layer so the chains are not hidden under the collar.
- V-neck: a mid-length pendant at 18 to 20 inches
- Crew neck: a 16-inch base with a longer chain on top
- Scoop neck: two chains close together, then one long drop
- High neck: skip the choker, start at 18 inches
Stacking Rings and Bracelets: Extending the Layered Look
Stacking extends the layered look from your neck to your hands. Keep ring stacks to three bands maximum on one finger, and vary the width so each band stays visible. Bracelets follow the same logic: one substantial piece, one delicate chain, and one texture.
Ring Stacking: Width, Spacing, and Finger Proportion
The mechanism that keeps a ring stack readable is width variation. Three bands of the same millimeter width blur into one thick band from a distance. A 1 mm band, a 2 mm band, and a 3 mm band read as three separate pieces even when they sit flush.
- Index and middle fingers: carry wider bands best because the finger is longer
- Ring and pinky fingers: suit 1 to 2 mm bands; a 3 mm band on a pinky looks heavy
- Thumb: one statement band only, stacking on the thumb crowds the hand
Bracelet Stacking: Weight Balance and Wrist Proportion
A bracelet stack follows the same 2:1:1 logic as a necklace stack, two delicate chains, one medium piece, one statement piece. On a smaller wrist, cap the stack at three bracelets; on a larger wrist, four to five can sit without crowding.
- Weight: one substantial link bracelet, two fine chains
- Texture: one beaded or hammered piece, the rest smooth
- Metal: keep the primary tone consistent with your necklace stack
Proportion: How Chain Length Interacts With Torso and Neck
Most guides stop at neckline matching. Proportion is the missing variable. A shorter torso carries shorter chains better, a 24-inch drop on a short torso can land near the waist and stretch the stack visually. A longer torso can carry a 24-inch drop without the stack looking pulled apart.
Maintenance and Longevity for Layered Fine Jewelry
Layered pieces wear against each other, so maintenance matters more than it does for a single chain. Wipe each piece with a soft cloth after wearing, and check clasps monthly for loosening. Gold vermeil and plated pieces should stay away from perfume, chlorine, and harsh cleaners.
Budget-Conscious Scaling: Building Your Layered Collection Over Time
You do not need to buy the whole stack at once. Buy one quality base chain, wear it for a month, and add the next piece only when you notice a genuine gap. This keeps spending deliberate and prevents a drawer full of pieces you never wear.
| Stage | What to Add | Why |
|---|---|---|
| Month 1 | One base chain | Establishes your drop point |
| Month 2 | A second chain, different weight | Creates visual separation |
| Month 3 | One pendant or charm | Adds a focal point |
| Month 4+ | A statement piece | Completes the stack |
Frequently Asked Questions
What is the 2:1:1 rule for jewelry layering?
The 2:1:1 rule suggests layering two delicate chains, one medium-weight chain, and one statement piece. This creates visual balance without overwhelming your neckline. For example, pair two thin gold chains with a medium curb chain and a pendant necklace. The ratio helps you avoid a cluttered look while still achieving depth.
How do you prevent fine necklaces from tangling when layered?
Use a spacer or a necklace separator to keep chains apart. Choose different chain styles like a snake chain, curb chain, or paperclip chain to reduce friction. Clasp each necklace at different lengths and store them individually in a jewelry roll or travel case. Magnetic clasps can also help keep layers secure.
How can I mix metals when layering fine jewelry?
Start with a dominant metal and add one accent metal. For instance, pair a gold vermeil chain with a sterling silver pendant. Repeat the accent metal once more in a ring or bracelet to tie the look together. Mixing textures like smooth and hammered finishes also helps blend metals naturally.
What is the best way to layer necklaces with different necklines?
For a V-neck, choose a pendant that follows the neckline's angle. With a crew neck, keep layers above the collarbone. A scoop neck works well with a graduated layered look. For a button-down shirt, leave the top buttons open and let a short chain sit just above the collar.
Building a layered look that lasts takes patience, and the pieces you choose matter as much as the order you wear them. TresAdore curates fine jewelry with the intention that each piece earns its place in your collection, from 925 sterling silver chains to gemstone sets designed to be worn together. Explore the collection and start your base layer with pieces worth keeping.


