

Table of Contents
- What Red Light Therapy Does for Aging Skin
- What You'll Need Before You Start
- How to Prepare Skin for Red Light Therapy
- Step-by-Step: How to Use Red Light Therapy for Anti Aging
- Red Light Therapy Treatment Duration and Frequency
- Best Red Light Therapy Devices for Face
- Common Mistakes and Eye Safety Specifics
- Frequently Asked Questions
Last Updated: September 12, 2026
What Red Light Therapy Does for Aging Skin
Red light therapy is a non-invasive treatment that uses specific wavelengths of light to stimulate cellular activity and support collagen production in the skin. For anti-aging purposes, it works by delivering concentrated red and near-infrared light to the deeper layers of the skin, where it encourages fibroblasts to produce more collagen and elastin.
We've watched this category shift from clinical offices to bathroom counters, and the results people report most often center on skin texture, fine lines, and overall radiance. Unlike topical products that sit on the surface, red light therapy targets the dermis directly.
The approach is sometimes called photobiomodulation or low-level light therapy, and it has moved from dermatological clinics into home devices that fit into a normal evening routine.
But here's what most guides skip: the method matters as much as the device. Below, we'll walk through exactly how to use red light therapy for anti aging, step by step, with the safety details that keep your skin protected.
How Photobiomodulation Reaches the Dermis
Red light sits in the visible spectrum, typically between 600 and 700 nanometers, while near-infrared light extends beyond that into the 800 to 900 nanometer range. These wavelengths penetrate past the epidermis and reach the dermis, the layer where collagen and elastin are made.
Once there, the light energy is absorbed by mitochondria, the power plants inside your cells. This absorption supports ATP production, the energy currency your cells use for repair and renewal. More available energy means fibroblasts can do their job: rebuilding the structural proteins that keep skin firm and smooth.
The practical takeaway is simple. You are not heating the skin or damaging it. You are feeding it light energy it can use.
What You'll Need Before You Start
Gathering the right setup takes five minutes and prevents most beginner mistakes. You need a clean face, a quality device, and eye protection.
- A red light therapy device rated for facial use, with a stated wavelength between 630 and 660 nanometers for surface benefits and 800 to 850 nanometers for deeper tissue
- Protective goggles designed for LED therapy, since the light is bright and you should never stare directly into the diodes
- A gentle cleanser to remove makeup, sunscreen, and oil
- A timer or your device's built-in session timer
- A lightweight serum or moisturizer to apply after treatment
How to Prepare Skin for Red Light Therapy
Preparing your skin for red light therapy is straightforward: cleanse thoroughly, skip active ingredients on treatment nights, and protect your eyes before you begin. Clean skin lets light reach the dermis without interference from product residue or makeup.

The order of operations matters more than most people expect. If you apply a thick cream before your session, that layer can block or scatter the light before it ever reaches living tissue. Save your skincare for after, when it can seal in results rather than get in the way.
Cleanse, Skip Actives, Protect Your Eyes
Start with a gentle, non-stripping cleanser. Remove every trace of sunscreen and foundation, then pat your face dry. Wet skin can dilute the effect and make the session feel inconsistent.
Skip retinoids, acids, and exfoliants immediately before treatment. These ingredients increase photosensitivity, and combining them with light therapy raises your risk of irritation and erythema, the redness that signals your skin barrier is stressed. Use them on alternate nights instead.
Then put on your protective goggles. Eye safety is the step people skip most often, and it is the one you cannot afford to ignore.
Which Skincare Ingredients to Avoid Before Treatment
Not all ingredients are safe to layer under red light. The biggest offenders are photosensitizing agents, ingredients that make your skin more reactive to light. These include:
- Retinoids (tretinoin, retinol, adapalene): Increase cell turnover and photosensitivity. Using them before a session can cause redness, peeling, and irritation.
- Alpha hydroxy acids (glycolic, lactic, mandelic): Exfoliate the stratum corneum, leaving skin more vulnerable to light and heat.
- Beta hydroxy acid (salicylic acid): Similar exfoliating effect, especially problematic for those with sensitive skin.
- Vitamin C (L-ascorbic acid): While an antioxidant, it can be unstable and irritating under light for some users. Some practitioners suggest avoiding it immediately before treatment.
- Essential oils and fragrances: Can cause photosensitivity and irritation when combined with light.
If you use any of these, apply them on alternate nights or at least 30 minutes after your red light session.
Which Ingredients Pair Well With Red Light Therapy
Certain ingredients are not only safe but may support results when used after treatment:
- Hyaluronic acid: Hydrates without blocking light and soothes the skin barrier post-session.
- Niacinamide: Supports barrier function and can reduce redness.
- Copper peptides: Studied for their role in collagen synthesis and wound healing; they layer well after light therapy.
- PDRN (polydeoxyribonucleotide): Often used in Korean skincare for regeneration; pairs well with light therapy's renewal focus.
- Ceramides: Replenish lipids and prevent moisture loss after treatment.
A simple rule: apply these after your session, not before. This lets light penetrate clean skin and then seals in hydration and active benefits.
Step-by-Step: How to Use Red Light Therapy for Anti Aging
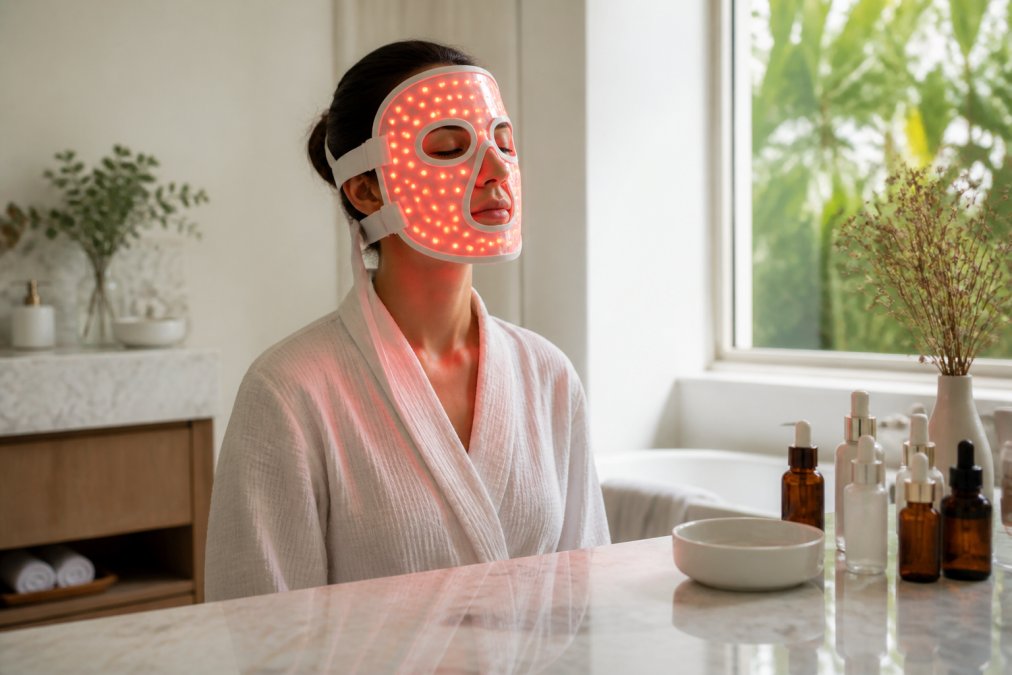
Using red light therapy for anti aging comes down to three repeatable steps: cleanse and dry, position the device and set your timer, then treat and follow with skincare. Total time is roughly 10 to 20 minutes per session.
Step 1: Cleanse and Dry Your Face
Wash with your gentle cleanser and pat dry. Pull your hair back so it does not cast shadows over your forehead or cheeks, and remove any jewelry that could block the light. Your skin should be bare and matte.
Expected result: A clean, dry surface with no product residue that could block light penetration.
Step 2: Position the Device and Set Your Timer
Hold or wear the device so it sits a consistent distance from your skin, following the manufacturer's guidance. Most home devices are designed to rest directly against the face or hover a short distance away. Set your timer for the duration your device recommends, usually 10 to 15 minutes.
Keep your eyes closed behind your goggles and stay still. Movement changes the distance and creates uneven coverage.
Expected result: Even light coverage across the forehead, cheeks, chin, and neck.
Step 3: Treat, Then Apply Skincare
Let the session run to completion, then remove your goggles. Follow immediately with a hydrating serum or moisturizer to support the skin barrier while it is most receptive.
This is the step where a targeted product pays off. A firming serum with copper peptides or a Korean PDRN essence pairs well with light therapy because both focus on skin renewal. If you want one product to anchor your post-treatment routine, the Copper Peptides Facial Serum from our collection layers cleanly and supports elasticity without heaviness.

Expected result: Skin that feels calm, hydrated, and slightly warm, never irritated.
Red Light Therapy Treatment Duration and Frequency
Red light therapy treatment duration for the face typically runs 10 to 20 minutes per session, three to five times per week (the FDA). Consistency matters far more than intensity. A short session done regularly outperforms a long session done occasionally.
Start with three sessions per week for the first month. If your skin tolerates it well, you can move to four or five. Most people who stick with a routine notice changes in skin texture and tone over several weeks, not overnight.
| Session Goal | Duration | Frequency | Notes |
|---|---|---|---|
| Beginner adjustment | 10 minutes | 3x per week | Watch for redness |
| Standard maintenance | 15 minutes | 4x per week | Most common routine |
| Intensive support | 20 minutes | 5x per week | Only if skin tolerates it |
The most common mistake is inconsistency. Devices get tucked in a drawer after two weeks, and then people conclude the technology does not work. It does, but only when you actually use it.
Best Red Light Therapy Devices for Face
The best red light therapy devices for face are the ones you will actually use consistently, with wavelengths in the 630 to 660 nanometer and 800 to 850 nanometer ranges and enough irradiance to deliver a therapeutic dose. Fit and comfort decide whether a device becomes a habit or a dust collector.
When comparing devices, look for these specific specs:
- Wavelength: 630-660 nm for surface collagen and texture, 800-850 nm for deeper tissue and elasticity. Devices that list only "red light" without a nanometer range are a red flag.
- Irradiance: Measured in mW/cm². Most home masks fall between 20 and 100 mW/cm² at the surface. Higher irradiance means shorter sessions, but too high without even coverage can cause hot spots.
- Treatment area: A full-face mask should cover forehead, cheeks, chin, and ideally the neck. Handheld wands are better for targeted areas like around the eyes or nasolabial folds.
- FDA clearance: Look for devices cleared as Class II medical devices for dermatological use (the FDA). This is not a guarantee of results, but it means the manufacturer has met basic safety and labeling requirements.
- Session timer and auto-shutoff: These prevent over-treatment and make consistency easier.
Masks suit people who want hands-free sessions and even coverage. Handheld wands suit targeted areas like the neck and around the eyes. Neck-specific devices matter because the neck ages visibly and often gets left out of facial routines.
Our Infrared LED Beauty Mask covers the full face with four adjustable intensity levels, so you can start gentle and build up as your skin adjusts. For the neck, the InfraRed Photon Therapy Device targets elasticity and wrinkle reduction in an area most people forget until it shows.

A common mistake is buying the cheapest option and then abandoning it because it feels flimsy or uncomfortable. A device you enjoy wearing gets used. One that pinches or slips does not.
Device Maintenance and Hygiene
Most guides ignore how to clean masks or panels, but this is critical for skin health and device longevity. Oil, sweat, and skincare residue build up on the diodes and can reduce light output over time. Wipe your mask or wand down after every session with a soft, slightly damp cloth, never spray liquid directly onto the diodes. Follow the manufacturer's cleaning guidance for the specific materials. If your device has a removable cover or strap, wash it according to instructions. A clean device delivers consistent output and prevents bacteria transfer to your skin.
Common Mistakes and Eye Safety Specifics
The biggest mistakes with at-home red light therapy are skipping eye protection, treating damp or product-covered skin, and quitting before the skin has time to respond. Eye safety deserves its own mention because the risks are real and easy to avoid.
Always wear goggles rated for LED therapy. Never stare into the diodes, even briefly, and never use a device marketed for the body on your face without checking that it is safe for facial use.
Device hygiene is the step nobody talks about. Wipe your mask or wand down after every session with a soft, slightly damp cloth, and follow the manufacturer's cleaning guidance. Buildup of oil and skincare residue on the diodes reduces output over time and can transfer bacteria to your skin.
If you see no results after eight weeks of consistent use, check three things: your wavelength range, your session frequency, and whether you are applying heavy products before treatment. Most non-results trace back to one of those three.
Building a red light routine that actually sticks takes the right device, a simple sequence, and the patience to let your skin respond over weeks rather than days. TresAdore curates the tools that make that routine effortless, from the Infrared LED Beauty Mask with four adjustable intensity levels to the InfraRed Photon Therapy Device built specifically for neck elasticity. Pair your sessions with a firming serum like our Copper Peptides Facial Serum, and you have a routine that supports collagen, protects your skin barrier, and fits into a normal evening. Explore the collection and reclaim your radiance with tools worth owning.
Frequently Asked Questions
How long should I do red light therapy for anti-aging?
Most at-home devices call for 10 to 20 minutes per session on clean, dry skin. Start at the lower end for the first two weeks to see how your skin responds, then build up. Consistency matters more than length: four to five short sessions a week beat one long session. Visible changes to fine lines and skin texture usually appear after 8 to 12 weeks of steady use.
What should I put on my face before using red light therapy?
Cleanse first and apply nothing that blocks light. Skip thick creams, oils, and occlusive balms, since they can scatter light before it reaches the dermis. If you want a conductive layer, a lightweight water-based serum works. Save retinoids, exfoliating acids, and vitamin C for after your session, because skin is more permeable during treatment and those ingredients can sting.
Can red light therapy damage your eyes?
Red and near-infrared light at home-device power levels is not considered harmful to eyes, but the brightness is uncomfortable and repeated direct exposure is worth avoiding. Wear the protective goggles that come with your device, or keep your eyes closed and turn away from the panel. If you have a history of eye conditions or take photosensitizing medication, check with your doctor first.
How long does it take to see results from red light therapy?
Collagen remodeling is slow, so expect the first changes in skin texture and glow around week four, with firmer-feeling skin and softened fine lines showing up between weeks 8 and 12. Photographs taken in the same light every two weeks make progress easier to judge than the mirror. If nothing has changed by week 12, check your treatment duration, device distance, and consistency before giving up.


